
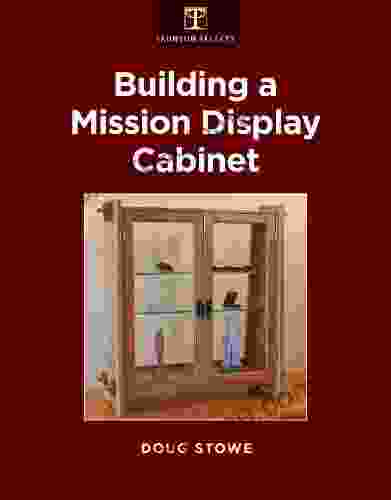
Unlock the Secrets of Building a Mission Display Cabinet

Are you ready to embark on a woodworking adventure that will bring both beauty and functionality to your home? Look no further than building your own Mission display cabinet, a timeless piece that combines classic style with practical purpose.
5 out of 5
| Language | : | English |
| File size | : | 5991 KB |
| Text-to-Speech | : | Enabled |
| Screen Reader | : | Supported |
| Enhanced typesetting | : | Enabled |
| Print length | : | 49 pages |
This step-by-step guide will guide you through the entire process, from gathering materials to applying the finishing touches. Along the way, you'll receive expert tips and tricks to ensure your cabinet turns out both stunning and durable.
Step 1: Gather Your Materials
- Red oak or mahogany lumber (1-inch thick)
- Plywood (1/2-inch thick)
- Glass (for the display case)
- Wood screws
- Wood glue
- Sandpaper
- Stain or paint (optional)
- Finishing wax
Step 2: Create the Frame
- Cut the lumber into the following pieces:
- 4 side pieces (36 inches long, 10 inches wide)
- 2 top pieces (18 inches long, 10 inches wide)
- 2 bottom pieces (18 inches long, 10 inches wide)
Step 3: Build the Display Case
- Cut the plywood into the following pieces:
- 2 back pieces (18 inches long, 36 inches wide)
- 2 side pieces (10 inches long, 36 inches wide)
- 1 top piece (18 inches long, 10 inches wide)
Step 4: Attach the Display Case to the Frame
- Center the display case on the frame.
- Secure the display case to the frame using wood glue and screws.
Step 5: Create the Doors
- Cut the lumber into the following pieces:
- 4 door stiles (36 inches long, 2 inches wide)
- 4 door rails (18 inches long, 2 inches wide)
Step 6: Attach the Doors to the Cabinet
- Center the doors on the cabinet.
- Secure the doors to the cabinet using wood glue and screws.
- Install hinges and handles.
Step 7: Sand and Finish
- Sand the entire cabinet with sandpaper, starting with a coarse grit and working your way up to a fine grit.
- Apply stain or paint if desired. Allow the finish to dry completely.
- Apply a coat of finishing wax to protect the finish.
Congratulations! You've Built Your Own Mission Display Cabinet
Your beautiful Mission display cabinet is now complete. Not only will it serve as a decorative addition to your home, but it will also provide a functional place to display your prized possessions. With its timeless design and sturdy construction, this cabinet will be enjoyed by your family for generations to come.
5 out of 5
| Language | : | English |
| File size | : | 5991 KB |
| Text-to-Speech | : | Enabled |
| Screen Reader | : | Supported |
| Enhanced typesetting | : | Enabled |
| Print length | : | 49 pages |
Do you want to contribute by writing guest posts on this blog?
Please contact us and send us a resume of previous articles that you have written.


Light bulbAdvertise smarter! Our strategic ad space ensures maximum exposure. Reserve your spot today!

 Harry HayesUnlock the Secrets of Survey Mapping with "Step by Step Guide: Survey Mapping...
 Dillon HayesBrain Food To Help Fight Symptoms Of Attention Deficit Hyperactivity Disorder


 Graham BlairFollow ·12.2k
 Reed MitchellFollow ·10.2k
 Bryson HayesFollow ·4.3k
 Cristian CoxFollow ·3.9k
 Edgar Allan PoeFollow ·5.1k
 Cruz SimmonsFollow ·14.8k
 Eric NelsonFollow ·5.1k
 Wesley ReedFollow ·19.9k

 Eugene Scott
Heal Your Multiple Sclerosis: Simple And Delicious...
Are you looking for a...

 Bo Cox
Myles Garrett: The Unstoppable Force
From Humble Beginnings Myles Garrett's...

 Ralph Turner
Discover the Wonders of Weather with My Little Golden...
My Little Golden...

 Arthur Mason
Kawaii Easy Sudoku Puzzles For Beginners: Unleashing Your...
Immerse Yourself...

 Felix Carter
Get Started in Stand-Up Comedy: Teach Yourself
Have you...

 Russell Mitchell
Challenge Your Mind: Test Your Chess Skills with an...
Are you ready to embark on a...
5 out of 5
| Language | : | English |
| File size | : | 5991 KB |
| Text-to-Speech | : | Enabled |
| Screen Reader | : | Supported |
| Enhanced typesetting | : | Enabled |
| Print length | : | 49 pages |
